Building Servers on the Fly
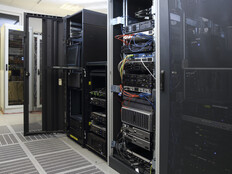
Looking for a quick, easy and inexpensive way to increase your file server capacity or do some server consolidation with existing hardware? A virtual file server using VMWare or Microsoft virtualization software may be just what you are looking for.
Just ask Jeff W. DeHaven, Manager of Information Technology at UniPath, LLC, a Denver-based provider of anatomic pathology services. Like many IT managers looking to consolidate servers to decrease maintenance costs for underutilized hardware, DeHaven plans to consolidate as many as eight servers onto just two machines, saving UniPath an estimated $10,000 to $16,000 per year in hardware maintenance agreements, plus thousands more in server software license fees.
“We’re looking at one powerful server taking over the role of multiple servers,” DeHaven says. “The main benefits I see are the elimination of redundant hardware, the elimination of associated costs for supporting that hardware — service contracts and maintenance agreements — and the elimination of dependency for these servers on a specific hardware model for restoring: in other words, [easier] disaster recovery.”
Less Is More
UniPath is currently testing consolidation using Microsoft Virtual Server 2005 and plans to implement its comprehensive server consolidation in early 2007, a new budget year, DeHaven says. He expects to save an estimated $1,200 to $2,000 in annual maintenance agreements for each of the underutilized servers that are starting to come off their original manufacturer’s warranties. Plus, as UniPath upgrades its current servers to Windows Server 2003, it will save on license fees, since it can run up to four instances of the server operating system in a virtual environment without buying an additional license.
Simplified backup and disaster recovery is another key benefit of server consolidation, DeHaven explains, since each virtual server is single file with no device drivers or other hardware dependencies to complicate restoring them from backups. UniPath plans to mirror its consolidated virtual servers on a similarly configured off-site machine to create a real-time backup.
“Depending on how this all works out and what sort of available bandwidth we can get with one of our off-site locations, then we would ideally have that replication partner in a separate facility,” DeHaven adds. “That way, in case of the dreaded smoking hole where your office was, you can still recover business.”
UniPath plans to virtualize database servers, document imaging servers, print and fax servers, but IT managers new to server virtualization can start with basic file servers. Building one using Microsoft’s Windows 2003 Server is fairly straightforward, as is creating a virtual file server using VMWare.
To install a new virtual file server on an existing Windows Server 2003 machine, it will need at least 5 gigabytes of free disk space to provide usable blocks of dedicated storage, known as “shares” to the users. The VMWare software installation is fast and simple. Once installed, open VMWare and click the New Virtual Machine icon to start the Virtual Machine Wizard. For your first virtual machine, just accept the defaults (A Typical Virtual Machine configuration) or choose Custom to set a specific memory and disk-space configuration.
A virtual machine of any kind has performance and capacity limitations, but VMWare provides a virtual machine with near native speed and response if configured correctly. For file servers, set aside at least 256MB of RAM for each virtual machine. The host operating system should have at least twice the dedicated RAM of the virtual machine after it is configured. Simply satisfying the minimum requirements for both operating systems will result in poor performance.
Start Your Engines
After setting up this virtual machine, click the Start This Virtual Machine link to power it up. You will notice that the virtual machine goes through its own POST (you can actually edit BIOS settings during the POST, just like a regular computer).
Begin installation of the file server as with any Windows install. Boot off of the Windows 2003 Server CD, accept the defaults in the text mode part of the installation — unless you have some special need for a custom installation (such as installing special SCSI or RAID card drivers), and then allow the installation to proceed. Once the installation goes into graphical mode, choose Custom settings from the Windows 2003 Network Settings screen. [FIGURE 1] Make sure that File and Printer Sharing for Microsoft Networks is selected on the Networking Components screen and then click Properties. [FIGURE 2]
Make sure that the radio button next to Maximize data throughput for file sharing is checked on the Server Optimization screen. FIGURE 3] Click OK. If your new server will be part of a workgroup or domain, you must type its name in here. [FIGURE 4] If you select domain, you will be prompted for administrative account information for your domain. Click Next, and the installation will continue on its own.
Adding the Admin
Once the server finishes its final restart, you will log in to your new server with the Administrator account and password that you set up during the installation and be presented with the Manage Your Server application. [FIGURE 5] Click Add or Remove a role and click Next on the Preliminary Steps screen. [FIGURE 6]
Select File Server on the Server Role screen, [FIGURE 7] and you can set some restrictions on the amount of disk space each user has on the File Server Disk Quotas screen, including setting a warning level (at which users will receive a warning that their disk usage is close to the limit). You may also choose to have users denied access if they exceed their quota. [FIGURE 8]
The next screen, File Server Indexing Service, is an optional setting you should probably leave off for performance reasons. [FIGURE 9] Click through the following two screens to begin the installation of your selected services and to start the Shared Folder Wizard. [FIGURE 10]
Here, if you know the path to the folder you want to share, and it exists, type it in the box on the lower portion of the screen or click the Browse button and click through an
Explorer-like file manager to select your folder. [FIGURE 11] The Name, Description and Settings screen allows you to customize your share with a new name and a description, which will show up in a network browse. [FIGURE 12] You should keep your share names to 15 characters or less and try to avoid spaces.
The next screen allows you to set the permissions on the shared folder (the default is read-only). [FIGURE 13] If you choose Use custom share and folder permissions [FIGURE 14] and click Customize, you will be presented with the User Manager application where you may grant specific users access to the share. Click Finish, then Close to complete this process or choose When I click Close, run the wizard again to share another folder and then click Close. [FIGURE 15] This screen also shows the Summary of your choices for the shared folder.
Once you see the This Server Is Now A File Server screen, [FIGURE 16] click Finish to return to the Manage Your Server application and note the changes. [FIGURE 17] Your server is now officially a File Server and users may begin mapping drives to the share to use it.
You also may create other shares on the File Server via the Share a Folder Wizard. The Manage Your Server application will be shown by default each time you logon to this server unless you click the Don’t display this page at logon in the bottom left corner of the screen. If you decide to get rid of this screen at startup, the application is found in Start → Programs → Administrative Tools. Depending on how your server is setup, you will have different options in the Manage Your Server application.
The following screens show you how to map a drive to the share from a user’s workstation.
On a user’s workstation, open My Computer, on the title bar click Tools, Map Network Drive and the following window opens.[FIGURE 18]
First, choose a Drive Letter for the mapped drive — the first available letter will be shown by default. Next, type in, or Browse for, the name of the share you wish to connect to. To make thee drive mapping permanent choose Reconnect at logon and click Finish. [FIGURE 19] Depending on how your workstations and Servers are configured, you may either now have a new drive mapping or be presented with the following dialog shown in Figure 20.[FIGURE 20]
Here, you will need to enter a username and password to make the connection to the shared folder on the server. It is also simpler to select Remember my password so that you won’t have to type in a password each time you map this drive.[FIGURE 21]
Once you enter a valid username and password and click OK, the drive is mapped. [FIGURE 22]
Additional reporting by Rob Garretson