5 Tips for Getting Started with Microsoft Azure

Whether you are considering moving all or part of your infrastructure to the cloud, Microsoft Azure is an emerging and maturing platform worth considering. Read these five tips to learn more about how your organization can get the most out of Azure.
1. Sign Up for a Free Month Trial
Microsoft provides a month-long free trial for businesses looking to evaluate its Azure platform, during which time you have a $200 credit for unlimited access. Once the trial has ended, you need to upgrade to Pay-As-You-Go or a subscription plan to continue using Azure.

Figure 1
2. Install Azure PowerShell cmdlets and Dependencies
The Azure management portal is a web interface that provides access to basic features, such as provisioning virtual machines (VMs), configuring virtual networks and managing storage. Much of Azure’s advanced functionality is available only via PowerShell, so if you intend to use Azure in earnest, install the Azure PowerShell cmdlets and set up a secure connection to your Azure subscription.

Figure 2
The PowerShell cmdlets can be downloaded free from Microsoft’s website, and you need to install all the dependent components if you want to leverage the full feature set. Microsoft is updating the Azure platform monthly, so check back for new versions of the management tools regularly.
To create a secure connection to your Azure subscription:
- Sign in to the web management portal.
- Open a PowerShell console with local administrative privileges, type Get-AzurePublishSettingsFile and press ENTER. You will be taken back to the browser and prompted to download a settings file. Save it to the local computer.
- In the PowerShell prompt, type Import-AzurePublishSettingsfile –PublishSettingsFile “c:\temp\your-filename.publishsettings” and press ENTER, replacing the file path with the location of your saved settings file.
- Finally, run Set-AzureSubscription “Pay-As-You-Go” -CurrentStorageAccount portalvhdsxgwgzn2ml54p5 and press ENTER to connect to your subscription. Your subscription name and storage account can be found in the web management portal.

3. Assign VMs Static IP Addresses
By default, Azure assigns IP addresses from a pool and doesn’t guarantee an address will be assigned again if the VM is de-allocated from the Azure fabric. To ensure that a VM gets the same address every time it is started, create a virtual network in the web portal and then open a PowerShell console with local administrative privileges and run the following commands:
$staticIP = Get-AzureVM -ServiceName myvm -name myvm Set-AzureStaticVNetIP -VM $staticIP -IPAddress 10.0.0.4 | Update-AzureVM
When VMs are created in Azure, they should be assigned their own cloud service unless you plan to load balance one or more VMs. The –ServiceName parameter is the VM’s cloud service name, and –name is the VM name. The Set-AzureStaticVNetIP cmdlet in the example above assigns a static IP of 10.0.0.4.
4. De-Allocate Unused Resources to Reduce Charges
The web management portal displays the status of VMs as running, stopped or stopped (de-allocated). To ensure charges are not incurred for VMs not in use, de-allocate them using the Shutdown button in the web management portal, or using the Stop-AzureVM cmdlet as shown below. Shutting down VMs from within the operating system doesn’t de-allocate resources from the Azure fabric.
Stop-AzureVM -ServiceName myvm -Name myvm
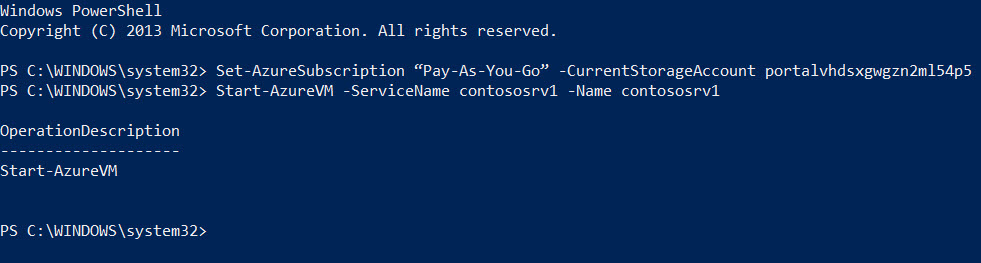
Figure 3
5. Connect your Onsite Network to the Azure Cloud
Site-to-site VPNs allow you to connect your on-premises network to Azure using IPsec. This requires a dedicated public IPv4 address at the network edge router. Point-to-site VPNs are designed to connect individual devices using the built-in Windows SSTP VPN client, and they can be useful for connecting off-site users to Azure resources not published on the public Internet. Point-to-site VPNs work over HTTPS and, as such, can traverse NAT routers.